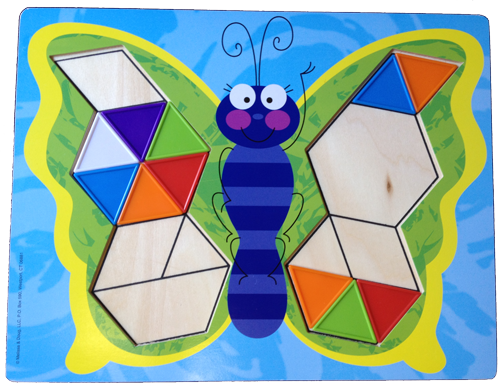
It has ten different animals (on five two-sided boards) and over 50 plastic shapes in tons of colors to complete the pictures.
Use it to teach more than just shapes.
Of course you can talk to your toddler about hexagons, triangles, parallelograms (which are also rhombuses in this math toy) and trapezoids. But you can do even more!
All the shapes can make the bigger ones. So it’s not just a bunch of shapes that may or may not work – this toy is designed with some serious thought.
Here are some questions you can ask while playing:
How many of each shape can squeeze into a hexagon?
Pick a shape and cram them into the hexagons!
How many triangles fit in each shape?
This is huge in math. Since all shapes can be made of triangles, answering this questions preps your little one for some big geometry stuff.
And after you play with those a while, you might notice how the number of sides of a shape compare to the number of smaller shapes that can fit in it.
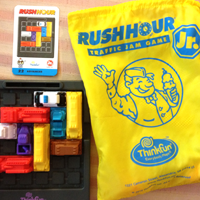
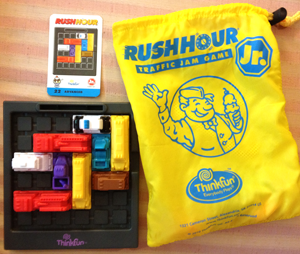
My sister-in-law showed me the Rush Hour Traffic Jam Game by Think Fun this weekend. She “assigned” one of the harder cards in the deck to me (sometimes it sucks to be known as the math mom) and assured me that I could do it.
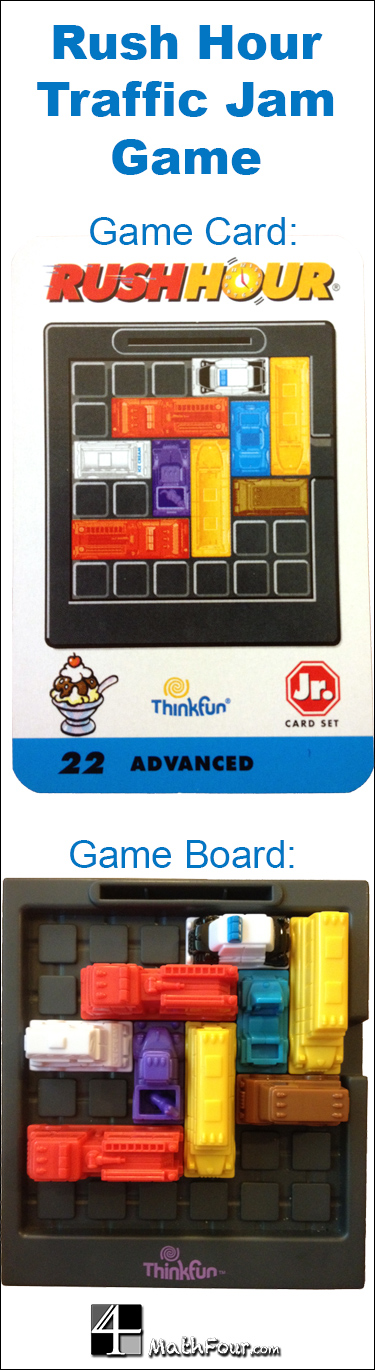
The Set-up
You set up the 6×6 game board with the plastic vehicles just like the game card shows. Here’s where the math starts.
The skills children develop doing this support graphing on the Cartesian coordinate plane later on.
Even if your child isn’t ready for the actual game play, this step supports them in math!
The Goal
Allow the ice cream truck to “escape” the maze.
In order to do this, you are allowed to slide any of the cars forward or back. They can’t crash into other cars to push them out of the way. And you can’t lift any of them off the game board.
A more challenging goal is to also do this in the minimum amount of moves possible.
The Strategy
Everyone has their own plan. My nephew likes to scooch the cars around until he stumbles upon an answer. I decided to pick up the cars and move them to the most unique solution to see what the end result should look like.
The Math
You’ve the coordinate plane. You have logic. And you have strategy. But you have someone much more amazing here.
The beauty of the game is the way it simulates mathematical research and discovery.
Everyone has their own style.
Everyone has their own solution.
If you follow the rules and “win” then you’ve done it right, regardless of how someone else did it.
There are many levels of success – and the player determines which level he or she is shooting for.
Given the board and the colorful cars, you can create your own game.
Wanna play?
The next time you’re tutoring or teaching math, consider treating it like the Rush Hour game. Give it to your child then back off. Refrain from telling or showing. Let him or her play.
As you wrap presents this holiday season, take a minute to notice the patterns in the wrapping paper. You might just find some math!
How does the paper come together in the back? Does it neatly match up, seamlessly? Or is it way off?
Are you able to scootch things a little so that you can get the paper to line up?
What happens when you use a different box?
Is this really math?
Absolutely!
Consider wallpaper: it has a pattern that repeats every so many inches. When you put wallpaper in your home it’s important to know how often it repeats so that you can match patterns in the corners and around windows, etc.
Patterned wrapping paper also repeats. Most people ignore it because they don’t think about matching the patterns in the back when wrapping gifts.
Unless they are particularly detail oriented, a perfectionist, or want to teach a little bit of math at home while wrapping presents…
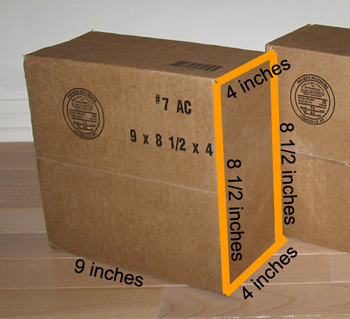
Choose your wrapping paper to match your boxes!
On this box your wrapping paper would go around 8 1/2 + 4 + 8 1/2 + 4 inches.
This means the wrapping paper would travel 25 inches before meeting back up with itself. So any wrapping paper that repeats after 5 inches or 25 inches will match back up in the back. Both 5 and 25 are factors of 25 – and that’s math!
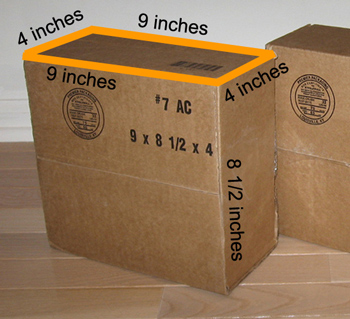
If you wrap the box the other way, instead, like this,
…the wrapping paper would travel 26 inches. Therefore any patterned wrapping paper that repeated after 2 inches, 13 inches or 26 inches would match in the back perfectly.
A box whose “wrap around” distance was 30 inches could use any wrapping paper that repeated after 2 inches, 3 inches, 5 inches, 6 inches, 10 inches, 15 inches or 30 inches. All those are factors of 30.
Choose your boxes to match your wrapping paper!
Or do it the other way – figure out how frequently your pattern repeats. Any box that has a girth of a multiple of this number can be wrapped perfectly. (Girth is the distance around the box – where you wrap the paper.)
For instance, if your wrapping paper repeated after 2 1/2 inches, you would look for boxes that have a girth of 2 1/2 inches (a tiny ring box), 5 inches, 7 1/2 inches, 10 inches. All the way up to giant boxes that have a girth of 314 1/2 inches.
Your turn!
How often does your favorite wrapping paper repeat? Have you found the perfect box/wrapping paper combination? Share your wrapping paper math discoveries in the comments!
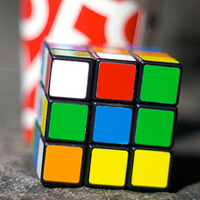
I stumbled upon the Paul Smith Gallery in Las Vegas a couple of weeks ago and was completely drawn by the Rubikcubism art by Invader on the wall.
It was a pixelated image that looked interesting from afar, but when you got close, there was a whole new surprise. It was made from 225 Rubik’s Cubes!
I spent a good 30 minutes in the shop talking to David, the Paul Smith associate. So many questions came up, including:
How can you make an image with only six colors? (Rubik’s cube has six sides, thus only six colors.)
The price tag on the artwork was $22,000, how much money was spent in actual Rubik’s cubes?
Could I do something like this?
If I were to replicate it, could you tell the difference between the original and the fake?
What kind of math is involved in creating something like this?
Can your kids do it?
It might be fun. It could get expensive, though: at $10 a pop, and after sales tax, 225 Rubik’s Cubes come to about $2500.
I don’t have this kind of money to drop on cubes, and I’m guessing that most homeschoolers don’t either. But for only $10 and the technology you already have around the house, you can let your child be a Rubikcubist!
They sure can!
If your children are inclined to give this a shot, buy them each a Rubik’s cube. Let them explore the number of sides, and the number of “pixels” on each side. If they don’t already know about how colors work together, they can either research or learn through experimentation.
They can choose to use graph paper & colored pencils, Microsoft Excel, or a paintbrush program to map out what they want their image to look like.
As they twist the Rubik’s Cube into each pattern, take a photo of it, or a color scan. Print it at full size and let them use the prints to create the final artwork.
Making Rubikcubist artwork is math!
Throughout the projects, explore the concepts of area and patterns. Also encourage them to think about color theory (of which I know squat, but your kids will be learning as they experiment).
Questions to ask:
How many total “pixels” did you use?
How many total Rubik’s Cubes did you use?
If you were to make this “for real,” how much would it cost us in Rubik’s Cubes?
What else did you notice about the project regarding colors, patterns and area?
Solving a Rubik’s Cube is math, too.
By the way, the solution to a Rubik’s cube is mathematical. It’s actually part of mathematics called group theory. My office mate in grad school was able to solve a Rubik’s cube in about 20 minutes.
I was never able to figure it out.
Share your art!
Put your child’s final artwork on Flickr.com or other photo service and post a link to it in the comments.
Feature image is by Robin Iversen Rönnlund on Flickr.com, CC BY.
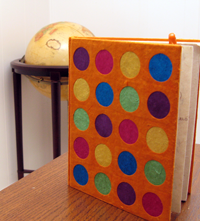
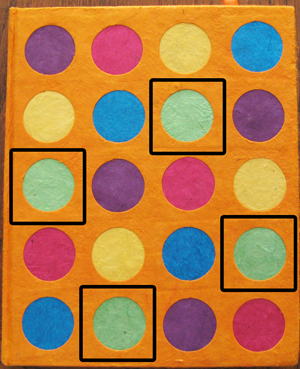
For my 40th birthday, I bought myself this beautiful Lokta paper book from a fabulous little store in the Houston Heights called Write Now!
It has circles on it – one of my “things.” I love circles. But then I saw how the colors were laid out.
“Holy cow! This is a teaching opportunity!” I thought.
And it got even better at the Texas Home School Coalition’s convention this last week. I shared it with former math teacher and now-homeschooler Sharon Brantley and she saw even more goodies in it!
You can use it to teach math!
Anything that has more than one aspect/characteristic/color (pretty much everything) can be checked for patterns. Patterns are an essential, perhaps even the most important, building block for mathematical thinking and development.
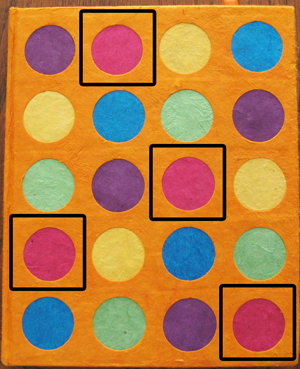
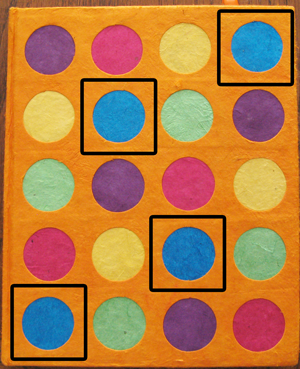
Here’s what you can see in this book cover:
Connect the green dots and you get a square. (Also the yellow dots.)The pink dots form a line and then the one dot off to the side can make a perpendicular line to the other line. (Purple dots, too.)
These blue dots make a funny little shape.
But wait! There’s more!
What Sharon pointed out to me was that you can draw an L from any dot to another dot of the same color!
Optional: This “L” thing links directly to the slope, by the way. Between any two points of the same color, the slope is either 1/2 or -2. Cool, huh?
Where do you see patterns in your world? Share it (and a link to the picture) in the comments!
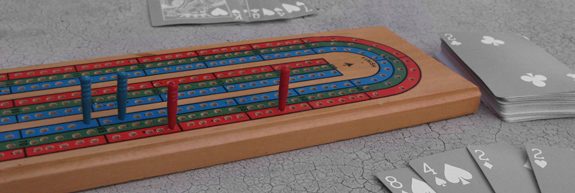
I was playing cribbage with Husband when I found my hand to be 8, 4, 2, 2 and the cut card was also a 2. I focused hard to see if I could come up with 15. (If any group of cards add to 15, you get two points.)
My resolve was strong. Then I remembered that for any group of numbers to add up to an odd number, one of them must be odd.
While shuffling for the next hand, I started thinking about adding evens and odds:
Even + Even = Even
Odd + Odd = Even
Odd + Even = Odd
This looked familiar. Then I remembered the rules of multiplying positives and negatives:
Pos x Pos = Pos
Neg x Neg = Pos
Neg x Pos = Neg
I was so excited to notice this. Alas, I’m pretty sure I’ve noticed it before. I love rediscovering patterns as much as discovering them!
Look for patterns everywhere.
Always keep your eyes peeled for similarities. When you see them, if your children are old enough, use leading questions to get them to observe the same thing. If they aren’t old enough, keep a journal to share things with them later. Encourage your kids to look for patterns in everything. Use toys and manipulatives to improve this, but also use nature and everyday activities. What patterns or nifty things in math have you noticed recently?
I was at a seminar yesterday with world famous (and awful fun) Thiagi. He keeps his participants on their toes with small activities called jolts. Jolts are defined at interactive experiential activities and:
…force participants to re-examine their assumptions and revise their habitual practices.
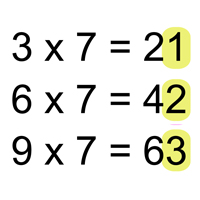
One jolt we did yesterday got me to thinking about math. Okay, many of them had me thinking about math. But this one was about the multiplication principal of counting and sets.
The multiplication principal says that if you have 7 ways to do the first thing and 3 ways to do the 2nd thing, then you’ll have 3 * 7 = 21 ways to do them together. Assuming you pick one of each.
So if I want a sandwich (tuna, ham or turkey) and a side (chips, onion rings, fruit or fries) for lunch, I will have the option of 3 * 4 = 12 different lunches.
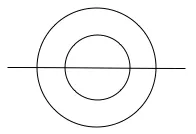
The Thiagi Circles Jolt
Here is the Circles Jolt that Thiagi offered: Draw this figure without ever lifting your pencil or retracing over any lines (or curves):
It isn’t hard, as you probably see. It takes anywhere from 10 to 45 seconds to figure it out. The question is, “Is there another way to do it than the one I thought of?”
So here are the ways I immediately thought of in the Thiagi Workshop:
The fancy pants teacher’s pet, Mark, was asked to demonstrate the answer. And he did it in an even different way! So I saw that there were 8 more ways to do it:
Trying to trump Mark and be the new teacher’s pet, I announced that there were indeed 16 ways to accomplish Thiagi’s goal.
There are 16 ways because of the Multiplication Principal of Counting.
Notice there are four questions to answer when solving this:
Do you start from left or right side of the drawing?
Do you start by drawing the outer circle or go through and start at the inner circle?
Do you go up or down on the first circle you draw?
Do you go up or down on the second circle?
Each question has two different options. So there are
2 sides to start from * 2 circles * 2 directions to go in the 1st circle * 2 direction in the 2nd circle
2 * 2 * 2 * 2 = 16 different ways to draw the diagram!
Teach this with experiments.
Although you now know how many there are, don’t teach it this way. Instead, just give the jolt to the kids. Once they solve it, show them “your way,” which should be any way that is different than theirs.
Then tell them that for ever unique solution, you’ll give them $1. (Thiagi gave out $1 bills yesterday, too!)
Once they come up with all 16, offer the extra $4 for some way they can show the number 16 with numbers (logically based on their solutions). They might come up with 2 * 8 or 4 * 4, as long as they can group their drawings in logical bundles.
Differentiation is the foundation of learning. Curiosity comes in the form of “Why is that different?” And right behind it is “Why is that the same?”
So patterns – and the lack of patterns – are essential in the development of a child.
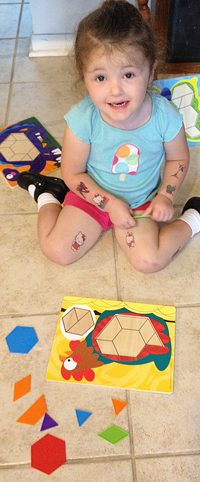
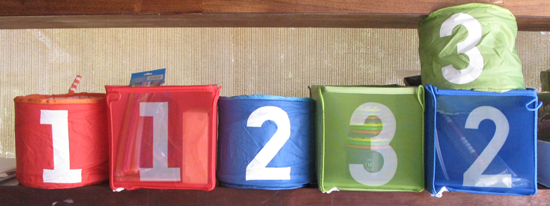
The picture below is a collection of Discovery Toys (not all of them because they live in a house with a 19mo child).
While in the tub, I encourage Daughter to see which ones are the same color. You can label the bathtub tiles with soap crayons so you can discuss the patterns more easily. Use the Cartesian Coordinate plane or Excel cell names like I did in Photoshop.
Here are some things to talk about to encourage pattern discovery and learning. Or click here to download this as a printable MSWord Document.
Which shapes are kind of the same (similar, but not in the official math sense of “similar”)
Put shapes together that “go together” – these could be same shape, color, “feel” (like B6 and B7 are both angled).
Compare shape A5 to the shapes A3, A4, A6, A7 and A8.
What do cells B3 and B8 have in common?
How are C3 and C4 different?
What’s in common in cells A2 and B2?
How are shapes C1 and C2 different?
How are C2 and B3 similar?
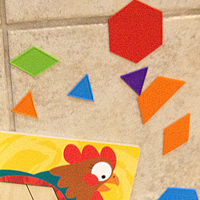
And then look at the world!
When you’re out of the tub, make sure to encourage observations – of everything. For something like the gate trim in the picture you can ask questions like:
What is similar?
What pieces are different?
Do you see spots that are kind of the same but mirror imaged?
If you were to make this symmetric, what other parts would you have to add to it?


