Part of Wordless Wednesday…


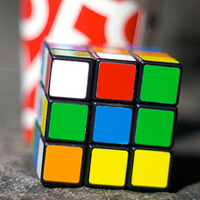
I stumbled upon the Paul Smith Gallery in Las Vegas a couple of weeks ago and was completely drawn by the Rubikcubism art by Invader on the wall.
It was a pixelated image that looked interesting from afar, but when you got close, there was a whole new surprise. It was made from 225 Rubik’s Cubes!
I spent a good 30 minutes in the shop talking to David, the Paul Smith associate. So many questions came up, including:
It might be fun. It could get expensive, though: at $10 a pop, and after sales tax, 225 Rubik’s Cubes come to about $2500.
I don’t have this kind of money to drop on cubes, and I’m guessing that most homeschoolers don’t either. But for only $10 and the technology you already have around the house, you can let your child be a Rubikcubist!
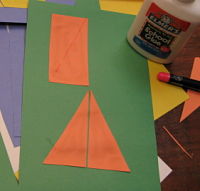
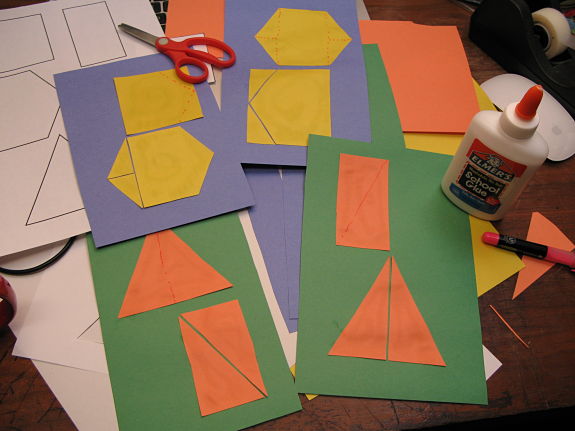
If your children are inclined to give this a shot, buy them each a Rubik’s cube. Let them explore the number of sides, and the number of “pixels” on each side. If they don’t already know about how colors work together, they can either research or learn through experimentation.
They can choose to use graph paper & colored pencils, Microsoft Excel, or a paintbrush program to map out what they want their image to look like.
As they twist the Rubik’s Cube into each pattern, take a photo of it, or a color scan. Print it at full size and let them use the prints to create the final artwork.
Throughout the projects, explore the concepts of area and patterns. Also encourage them to think about color theory (of which I know squat, but your kids will be learning as they experiment).
Questions to ask:
By the way, the solution to a Rubik’s cube is mathematical. It’s actually part of mathematics called group theory. My office mate in grad school was able to solve a Rubik’s cube in about 20 minutes.
I was never able to figure it out.
Put your child’s final artwork on Flickr.com or other photo service and post a link to it in the comments.
Feature image is by Robin Iversen Rönnlund on Flickr.com, CC BY.
Written as part of the Count 10, Read 10 series.
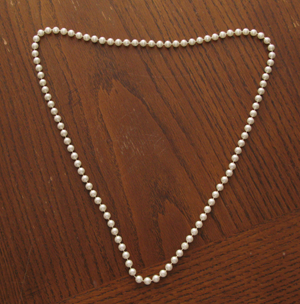
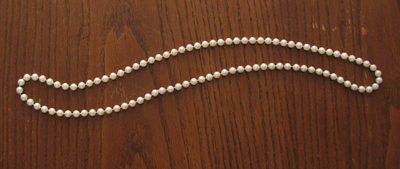
I noticed Daughter attempting to bejewel Husband with a strand of my faux pearls the other day. I watched, enthralled with the math learning taking place.
She held the necklace in her hands – one on each side. Just about equal. So the space available for Husband’s head was almost non-existent. Like this:
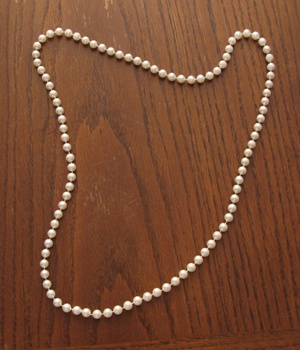
If she were to hold the necklace at two points that were closer together, she would create a “dip” in the necklace where his head could fit. Like this:
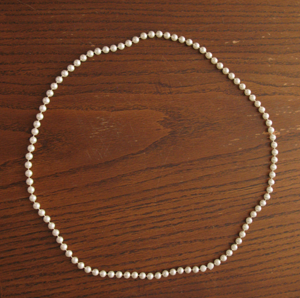
This made me think of all the nifty things you can show about the relationship of perimeter to area and how you can have the same perimeter but change the area to all sorts of sizes.

If you aren’t wearing a necklace, find some mardi-gras beads. Daughter has many strands, so I’m guessing your house might be littered with them as well. If not, join the club. Go buy some.
Play with them in the bathtub or right before bed. (Make sure they give them up before going to sleep, though – it’s a strangulation hazard!)
Move the necklace around on a flat surface (or on the bed) and let your child experiment with the ways the area changes. Ask questions like:
Don’t forget, activities like this should be fun. For your child as well as you. So don’t get too in depth talking the math talk if it feels weird. Go with the flow.
And let me know how that flow goes, would you? Share your thoughts in the comments.